有時,您希望兩個元件的狀態始終一起更改。為此,請從它們兩個中移除狀態,將其移至它們最接近的共同父元件,然後透過 props 將其向下傳遞。這稱為 *狀態提升*,這是撰寫 React 程式碼時最常做的事情之一。
你將學到
- 如何透過提升狀態來在元件之間共享狀態
- 什麼是受控和非受控元件
以範例說明狀態提升
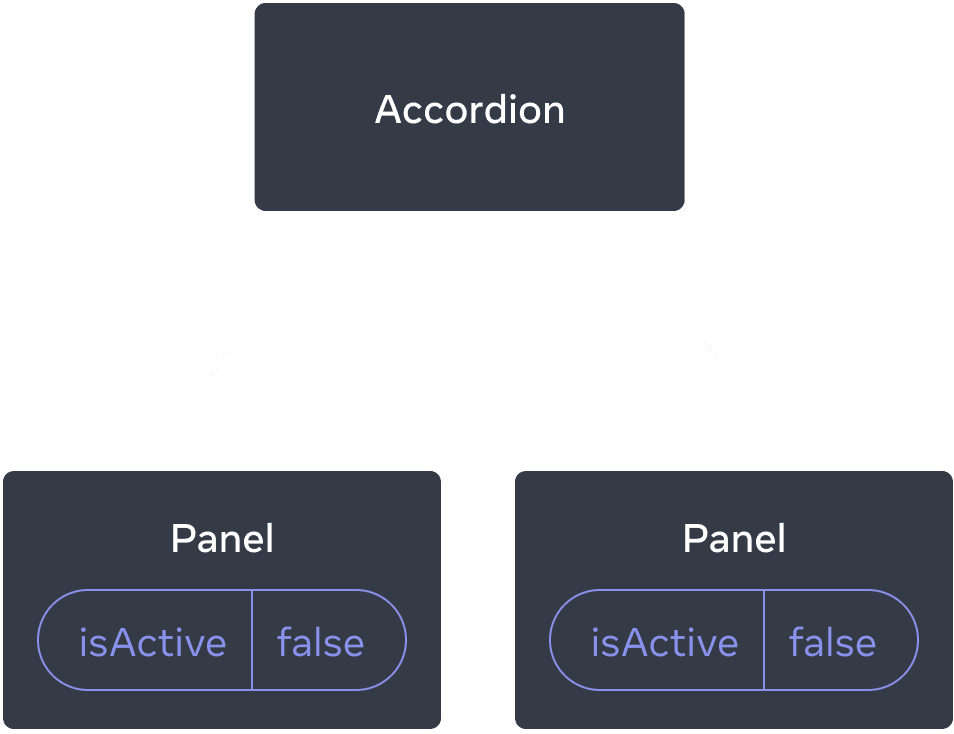
在此範例中,父 Accordion 元件渲染兩個獨立的 Panel
手風琴面板面板
每個 Panel 元件都有一個布林值 isActive 狀態,決定其內容是否可見。
按下兩個面板的「顯示」按鈕
import { useState } from 'react';

function Panel({ title, children }) {
  const [isActive, setIsActive] = useState(false);
  return (
    <section className="panel">
      <h3>{title}</h3>
      {isActive ? (
        <p>{children}</p>
      ) : (
        <button onClick={() => setIsActive(true)}>
          Show
        </button>
      )}
    </section>
  );
}

export default function Accordion() {
  return (
    <>
      <h2>Almaty, Kazakhstan</h2>
      <Panel title="About">
        With a population of about 2 million, Almaty is Kazakhstan's largest city. From 1929 to 1997, it was its capital city.
      </Panel>
      <Panel title="Etymology">
        The name comes from <span lang="kk-KZ">алма</span>, the Kazakh word for "apple" and is often translated as "full of apples". In fact, the region surrounding Almaty is thought to be the ancestral home of the apple, and the wild <i lang="la">Malus sieversii</i> is considered a likely candidate for the ancestor of the modern domestic apple.
      </Panel>
    </>
  );
}
請注意,按下一個面板的按鈕不會影響另一個面板——它們是獨立的。

最初,每個 Panel 的 isActive 狀態為 false,因此它們都顯示為摺疊狀態


點擊任一 Panel 的按鈕只會更新該 Panel 的 isActive 狀態
但現在假設您想要更改它,以便在任何給定時間只有一個面板展開。 使用該設計,展開第二個面板應該會摺疊第一個面板。你會怎麼做?
要協調這兩個面板,您需要透過三個步驟將其狀態「提升」到父元件
- 移除子元件中的狀態。
- 傳遞來自共同父元件的硬編碼資料。
- 新增狀態到共同父元件,並將其與事件處理器一起向下傳遞。
這將允許 Accordion 元件協調兩個 Panel 並一次只展開一個。
步驟 1:移除子元件中的狀態
您將把 Panel 的 isActive 控制權交給其父元件。這表示父元件將 isActive 作為 prop 傳遞給 Panel。首先從 Panel 元件中移除此行
const [isActive, setIsActive] = useState(false);而是將 isActive 新增到 Panel 的 props 列表中
function Panel({ title, children, isActive }) {現在,Panel 的父元件可以透過將其作為 prop 傳遞來*控制* isActive。相反地,Panel 元件現在*無法控制* isActive 的值——現在由父元件決定!
步驟 2:從共同父元件傳遞硬編碼資料
要將狀態提升,您必須找到您想要協調的*兩個*子組件的最近共同父組件。
Accordion(最近共同父組件)面板面板
在此範例中,它是 Accordion 組件。由於它位於兩個面板的上方,並且可以控制它們的屬性,因此它將成為目前哪個面板處於活動狀態的「唯一真相來源」。讓 Accordion 組件將硬編碼的 isActive 值(例如,true)傳遞給兩個面板。
import { useState } from 'react';

export default function Accordion() {
  return (
    <>
      <h2>Almaty, Kazakhstan</h2>
      <Panel title="About" isActive={true}>
        With a population of about 2 million, Almaty is Kazakhstan's largest city. From 1929 to 1997, it was its capital city.
      </Panel>
      <Panel title="Etymology" isActive={true}>
        The name comes from <span lang="kk-KZ">алма</span>, the Kazakh word for "apple" and is often translated as "full of apples". In fact, the region surrounding Almaty is thought to be the ancestral home of the apple, and the wild <i lang="la">Malus sieversii</i> is considered a likely candidate for the ancestor of the modern domestic apple.
      </Panel>
    </>
  );
}

function Panel({ title, children, isActive }) {
  return (
    <section className="panel">
      <h3>{title}</h3>
      {isActive ? (
        <p>{children}</p>
      ) : (
        <button onClick={() => setIsActive(true)}>
          Show
        </button>
      )}
    </section>
  );
}
嘗試編輯 Accordion 組件中硬編碼的 isActive 值,並在螢幕上查看結果。
步驟 3:將狀態添加到共同父組件
提升狀態通常會改變您儲存為狀態的內容的性質。
在這種情況下,一次應該只有一個面板處於活動狀態。這表示 Accordion 共同父組件需要追蹤*哪個*面板是活動的。它可以使用數字作為活動 Panel 的索引作為狀態變數,而不是布林值。
const [activeIndex, setActiveIndex] = useState(0);當 activeIndex 為 0 時,第一個面板處於活動狀態,而當它為 1 時,第二個面板處於活動狀態。
點擊任一 Panel 中的「顯示」按鈕需要更改 Accordion 中的活動索引。 Panel 無法直接設定 activeIndex 狀態,因為它是在 Accordion 內部定義的。 Accordion 組件需要透過將事件處理函式作為屬性傳遞來*明確允許* Panel 組件更改其狀態。
<>
  <Panel
    isActive={activeIndex === 0}
    onShow={() => setActiveIndex(0)}
  >
    ...
  </Panel>
  <Panel
    isActive={activeIndex === 1}
    onShow={() => setActiveIndex(1)}
  >
    ...
  </Panel>
</>
Panel 內部的 <button> 現在將使用 onShow 屬性作為其點擊事件處理函式。
import { useState } from 'react';

export default function Accordion() {
  const [activeIndex, setActiveIndex] = useState(0);
  return (
    <>
      <h2>Almaty, Kazakhstan</h2>
      <Panel
        title="About"
        isActive={activeIndex === 0}
        onShow={() => setActiveIndex(0)}
      >
        With a population of about 2 million, Almaty is Kazakhstan's largest city. From 1929 to 1997, it was its capital city.
      </Panel>
      <Panel
        title="Etymology"
        isActive={activeIndex === 1}
        onShow={() => setActiveIndex(1)}
      >
        The name comes from <span lang="kk-KZ">алма</span>, the Kazakh word for "apple" and is often translated as "full of apples". In fact, the region surrounding Almaty is thought to be the ancestral home of the apple, and the wild <i lang="la">Malus sieversii</i> is considered a likely candidate for the ancestor of the modern domestic apple.
      </Panel>
    </>
  );
}

function Panel({
  title,
  children,
  isActive,
  onShow
}) {
  return (
    <section className="panel">
      <h3>{title}</h3>
      {isActive ? (
        <p>{children}</p>
      ) : (
        <button onClick={onShow}>
          Show
        </button>
      )}
    </section>
  );
}
狀態提升完成!將狀態移至共同父組件允許您協調兩個面板。使用活動索引而不是兩個「已顯示」標誌可確保在給定時間只有一個面板處於活動狀態。並且將事件處理函式傳遞給子組件允許子組件更改父組件的狀態。


最初,Accordion 的 activeIndex 為 0,因此第一個 Panel 收到 isActive = true。


當 Accordion 的 activeIndex 狀態更改為 1 時,第二個 Panel 會收到 isActive = true。
深入探討
通常將具有一些局部狀態的組件稱為「非受控」。例如,具有 isActive 狀態變數的原始 Panel 組件是非受控的,因為其父組件無法影響面板是否處於活動狀態。
相反,當組件中的重要資訊由屬性而不是其自身的局部狀態驅動時,您可能會說該組件是「受控的」。這允許父組件完全指定其行為。具有 isActive 屬性的最終 Panel 組件由 Accordion 組件控制。
非受控組件在其父組件中更容易使用,因為它們需要的配置更少。但是,當您想要將它們協調在一起時,它們的靈活性較差。受控組件具有最大的靈活性,但它們需要父組件使用屬性對其進行完全配置。
實際上,「受控」和「非受控」並不是嚴格的技術術語——每個組件通常都混合了局部狀態和屬性。但是,這是討論組件如何設計以及它們提供哪些功能的有用方式。
編寫組件時,請考慮其中的哪些資訊應該受控(透過屬性),哪些資訊應該不受控(透過狀態)。但您始終可以改變主意並稍後重構。
每個狀態的唯一真相來源
在 React 應用程式中,許多組件將擁有自己的狀態。某些狀態可能「存在於」靠近葉子組件(樹底部的組件)的地方,例如輸入框。其他狀態可能「存在於」靠近應用程式頂部的地方。例如,即使是客戶端路由庫通常也是透過將當前路由儲存在 React 狀態中,並透過屬性將其傳遞下去來實現的!
對於每個唯一的狀態,您將選擇「擁有」它的組件。這個原則也稱為擁有「唯一真相來源」。這並不意味著所有狀態都存在於一個地方——而是指對於*每個*狀態,都有一個*特定*的組件持有該資訊。不要在組件之間複製共用狀態,而是將其*提升*到它們的共同共用父組件,並將其*傳遞*給需要它的子組件。
您的應用程式會隨著您的工作而改變。當您仍在確定每個狀態的「位置」時,通常會將狀態向下或向上移動。這都是過程的一部分!
要了解在實務中使用更多組件時的感受,請閱讀用 React 思考。
重點回顧
- 當您想要協調兩個組件時,請將它們的狀態移動到它們的共同父組件。
- 然後,將資訊透過屬性 (props) 從它們的共同父組件傳遞下去。
- 最後,將事件處理函式傳遞下去,以便子組件可以更改父組件的狀態。
- 將組件視為「受控的」(由屬性驅動)或「非受控的」(由狀態驅動)會很有幫助。
挑戰 1之 2: 同步輸入框
這兩個輸入框是獨立的。讓它們保持同步:編輯一個輸入框應該使用相同的文字更新另一個輸入框,反之亦然。
import { useState } from 'react';

export default function SyncedInputs() {
  return (
    <>
      <Input label="First input" />
      <Input label="Second input" />
    </>
  );
}

function Input({ label }) {
  const [text, setText] = useState('');

  function handleChange(e) {
    setText(e.target.value);
  }

  return (
    <label>
      {label}
      {' '}
      <input
        value={text}
        onChange={handleChange}
      />
    </label>
  );
}